dinsdag 31 mei 2011

Rodo's en meer!

Prachtig zijn de rodo's het is ieder jaar weer genieten.


We hebben lekker gefietst met het mooie weer van de laatste dagen. Onder andere naar de sluizen van Driel waar we van de winter ook waren gaan kijken tijdens het hoge water.
Wat een verschil met de lage waterstand van nu!


En een foto vanaf de brug over de Nederrijn bij Renkum, waar de koeien op de droge uiterwaarden staan.


Wel heel bijzonder om te zien!

Groetjes, Hetti ;-))


zondag 22 mei 2011

Zwitserland

In herinnering aan Diny die zo graag naar Zwitserland op vakantie ging.


In plaats van een persoonlijke herinnering over haar te schrijven heb ik dit hart voor haar dochter geborduurd.

Het chalet met de bergen, de edelweiss en het hartjes patroon komen uit diverse gratis patroontjes van Gazette 94 die ik tot een patroon heb ontworpen. Merci bien Claire!

Het hart heeft een mooi plaatsje tussen de Zwitserland souvenirs gekregen, voor mij was het een bijzonder mooie ervaring om zo afscheid te nemen.


Groetjes van Hetti.

dinsdag 10 mei 2011

Stitchery

Mijn nichtje Marit kijkt graag op mijn blog en kwam via een van de favoriete blogs terecht op een site vol met stitchery patronen. Het was helemaal nieuw voor haar en ze vond de patronen erg leuk. Ze heeft het helemaal zelf uitgezocht hoe ze een stitchery patroon kon borduren en dit is het resultaat!


Op gekleurde stof heeft ze de theepot en bloemen geborduurd. Ze vond stitchery alleen in een rode of blauwe kleur borduurgaren een beetje saai en heeft haar eigen creativiteit erop los gelaten. En de kraaltjes maken het helemaal af! En ze heeft de stitchery zelf ingelijst.
Ze is nog niet zolang aan het borduren, maar ze doet het geweldig!

Op mijn kaarten houder heb ik mooie kadootjes en kaarten gestoken. Onder andere een paarse kaart met een geborduurd hart ook zelfgemaakt door Marit. Ik hoop dat ze nog veel meer leuke en mooie borduurwerkjes gaat maken!


Door het mooie weer van de laatste tijd is de natuur 3x zo hard gaan groeien, zo lijkt het althans. Zelfs de rododendrons in de tuin doen hier aan mee. Meestal bloeien ze eind mei, begin juni.


Na de verfrissende regenbuien van maandag die al het stof en zand eraf heeft gespoeld zien ze er zo mooi uit.
Het is echt geweldig om rondom ons huisje zo'n zee van oudere rodo's in roze, paarse en rode kleuren te mogen hebben! Zelfs de veel te groot en te hoog geworden rodo's die we vorig jaar drastisch moesten snoeien lopen weer helemaal uit.
We genieten er volop van.

Groetjes Hetti ;-))

zondag 24 april 2011

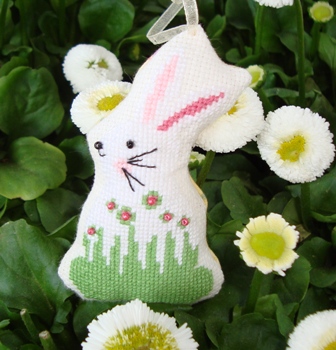
Fijne Paasdagen, Happy Easter!

Fijne Paasdagen!
 En ik hoop dat iedereen kan genieten van dit mooie en zonnige weer!


Happy Easter!

vrijdag 15 april 2011

Workshop Chicken/Humbug

This is a new update from the Workshop Embroidered Chicken/Humbug for the English readers.


Workshop Embroidered Easter Chicken

In this workshop you will make a embroidered Easter Chicken.

Supplies;
* A small geometric embroidery pattern, see the photo, or take an Easter pattern that you like.
* Embroidery fabric piece of 10 x 10 cm ( 4 x 4 inches ) 
* Matching embroidery thread.
* 4 small red beads for the comb and beak.
* 2 black beads for the eyes.
* If you like some beads in the embroidery pattern.


The chicken can be made in any format, so if you have a larger embroidery pattern, just take a larger fabric.
Please note that the fabric must be  square!
The chicken in the picture is 8 x8 cm ( about 3 x 3 inches )

Advice;
Please read first the instructions and look good at the pictures to understand this method.

Method;
1
Embroider the pattern on both pieces of fabric and embroider with embroidery floss an edge of backstitches around the pattern, so that around 1 cm (0.5 inch) seam remains.

2
Fold the seams inside and put the two pieces of fabric with the back sides together. If necessary put a pin in the pieces to hold the pieces neatly together.
So now you look at the good sides of the fabric.

Take a embroidery needle with the same color embroidery floss and begin to stitch at a corner;
Take one backstitch from each piece of fabric on your needle and pull the thread through it.

                                             
Sew like this to almost the end of the fabric and add 3 red beads for the comb. See picture 4.
Make the last stitch a double stitch for strength and let the tail.

On the pictures of the workshop you can see I have used cross stitches as a backstitch. If you want to use this method instead of backstitches, take a half cross stitch of each fabric on your needle and pull the thread.
But backstitches are easier to start.


Sew the two black beads  on the fabric at the height of the eyes.
See the picture below.

3
Sew the second side and add a red bead as a beak.
See picture below.


4
Sew the third side together and sew an extra stitch at the corners for reinforcement.
See the picture below.


5
Fold the chicken open in the width and prevent the center seams align.
See the picture below.


6
Fold  neatly the seams inside and start to sew from one side to halfway up.
Fill the chicken with fiberfill or a other fill stuff, but you can also use lavender or a potpourri.
Sew the other half to close the chicken. And now your chicken is ready!

                      Have fun and succes in making the Easter Chicken,

                                             Hetti ;-))


Related Posts Plugin for WordPress, Blogger...